

Table of Contents
- Tools and Equipment You'll Need to Measure for Skirting Boards
- Measuring Your Room Perimeter and Straight Walls
- How to Measure Internal and External Corners
- Accounting for Door Frames and Architraves
- How to Cut Skirting Board Corners: Angles and Techniques
- How to Scribe Skirting Boards for Uneven Walls
- Calculating Linear Metres and Using a Skirting Board Calculator
- Standard Skirting Board Heights and Profile Selection
Last Updated: July 22, 2026
Measuring for skirting boards correctly is the foundation of any successful installation. Get this step wrong, and you'll face costly offcuts, mismatched joints, or worse, having to reorder materials mid-project. This guide covers the exact process to help you achieve professional results on your first attempt.
Measuring involves more than grabbing a tape measure and jotting down room dimensions. You need to account for internal corners, external corners, door frames, architraves, uneven walls, and wastage allowance. The difference between a rushed measurement and a methodical one often determines whether your finished room looks polished or patched.
Tools and Equipment You'll Need to Measure for Skirting Boards
A steel tape measure of at least 5 metres is essential, cloth tape measures stretch over time and give inconsistent readings. A spirit level helps identify uneven walls before you start cutting. Pencils and a notepad matter more than you'd think; mark measurements directly on walls, then record them in writing. A combination square or sliding bevel helps you identify corner angles precisely, especially in older properties where corners may not be true 90 degrees. Masking tape helps you mark measurement points without damaging paintwork.
Digital Measuring Tools for Greater Accuracy
Laser distance meters measure room length to within 2-3 millimetres, beating hand-held tape measures for long walls. Smartphone measurement apps are free and useful for quick verification, though not as precise as laser meters. Digital angle finders measure corner angles to the nearest degree, saving you from guesswork on non-standard corners.
Measuring Your Room Perimeter and Straight Walls
Measure each wall from corner to corner at the height where skirting will sit, typically 150-230 millimetres from the floor. Don't measure at floor level; floors aren't always level. Work systematically around the room, recording each measurement. For walls longer than 5 metres, divide the wall into sections and measure each separately.
Create a simple sketch of your room and label each wall with its measurement. Write measurements in millimetres to prevent confusion when calculating total linear metres later. Take photos of your marked walls and written measurements as backup. Double-check every measurement before moving to the next wall.
How to Measure Internal and External Corners
Corner measurement is where most DIY mistakes occur. Internal corners (where two walls meet inside the room) and external corners (where walls form an outward-pointing corner) require different approaches.
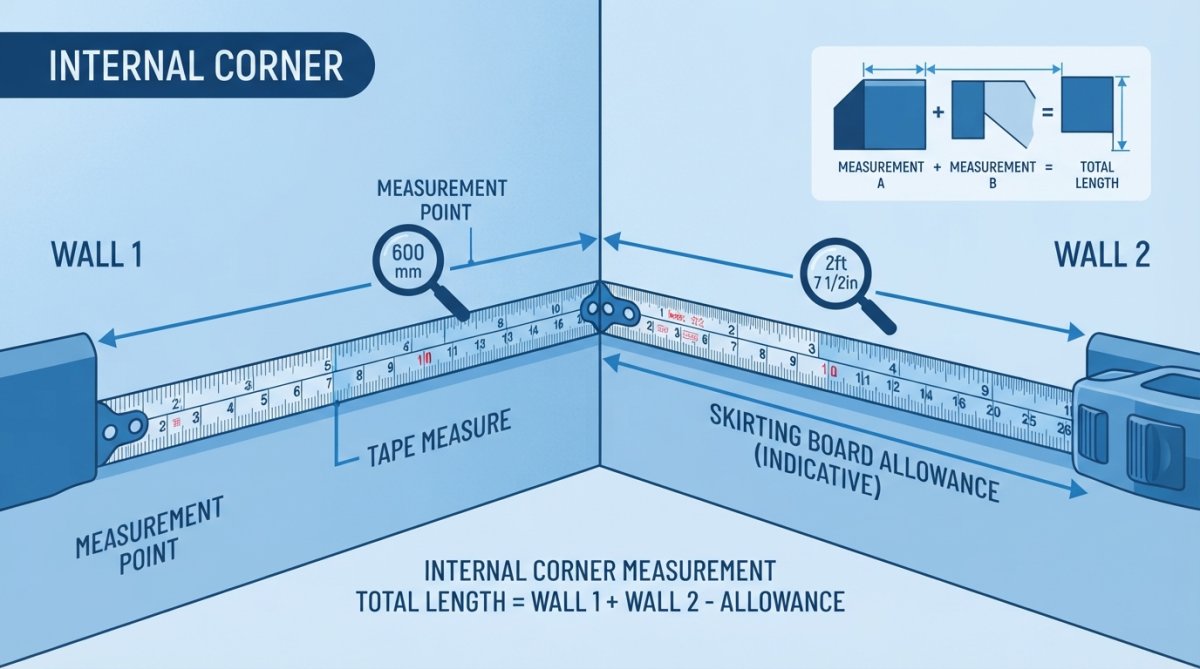
An internal corner is where two walls meet and form a 90-degree angle pointing into the room. Measure internal corners by running your tape along each wall up to where the walls meet. Record the measurement for each wall separately.
An external corner occurs when a wall juts out into the room, creating an outward-pointing angle. Measure from the internal corner on one side of the external corner to the internal corner on the other side. This measurement includes the external corner itself.
Measuring for Miter Joints at 45-Degree Angles
A miter joint is where two pieces of skirting meet at a 45-degree angle, creating a seamless corner. For an internal corner, each piece of skirting runs from the previous corner to the mitre point. For an external corner, the measurement includes the corner itself, with both pieces cut at 45 degrees and meeting at the external point.
Accounting for Door Frames and Architraves
Measure the wall up to the point where the door frame starts, then measure from where the door frame ends to the next corner. Measure the width of the door frame itself. If skirting crosses the bottom of the frame, add the frame width to your total linear metres.
Architrave is the trim that frames the door opening vertically and horizontally. Measure the vertical architrave on both sides of the door and the horizontal architrave above the door. Include these lengths in your total linear metres calculation. When ordering, you can order skirting and architrave together in the same profile to ensure colour and texture match perfectly.
How to Cut Skirting Board Corners: Angles and Techniques
Transfer your measurements onto the actual skirting board using a pencil. Mark the length of each piece clearly and use a combination square or sliding bevel to mark the angle at which you'll cut. For a 45-degree mitre cut at an internal corner, mark the angle so the cut slopes from the top outer edge of the board down to the bottom inner edge.
A miter saw is the standard tool for cutting skirting boards. Set the saw to 45 degrees for mitre cuts. Position the skirting in the saw with your marked line aligned with the blade, sitting flat and stable. Let the blade do the work; don't force it. Make test cuts on scrap material first before cutting your actual skirting.
How to Scribe Skirting Boards for Uneven Walls
Real walls aren't perfectly flat or straight. Scribing means cutting the skirting profile to match the wall's actual shape, rather than cutting a straight edge.
A profile gauge is a tool with multiple thin metal pins that slide in and out. Press it against the wall, and the pins conform to the wall's shape. Transfer this profile to your skirting, then cut along the traced line using a coping saw or jigsaw. For minor waves or bumps, scribing creates a gap-free fit that a straight cut can't achieve.
For tighter curves, you may need to use flexible skirting or cut skirting into shorter sections and mitre them at slight angles to follow the curve. Check with your supplier whether your chosen profile offers flexibility.
Calculating Linear Metres and Using a Skirting Board Calculator
Add all your wall measurements together. If you measured in millimetres, divide the total by 1000 to get metres. Include your architrave measurements in this total.
Most skirting comes in standard lengths: 2.4 metres, 3 metres, or 4.2 metres per board. Divide your total linear metres by the board length to see how many boards you need.
Add 10-15% to your calculated linear metres as a wastage allowance for mistakes, test cuts, and offcuts. For 13.8 metres, add 1.4 to 2.1 metres, bringing your total to 15.2 to 15.9 metres. For small rooms under 15 metres, a 15% allowance is sensible. For large rooms over 30 metres, 10% is often sufficient.
Measurement Step |
What You're Measuring |
How to Record It |
|---|---|---|
Straight walls |
Distance from corner to corner at skirting height |
Individual wall length in millimetres |
Internal corners |
Where two walls meet inside the room |
Measure each wall separately to the corner |
External corners |
Where walls form an outward point |
Measure across the full width including the corner |
Door frames |
Width of the frame where skirting crosses it |
Frame width in millimetres |
Architrave |
Vertical and horizontal trim around doors |
Each piece length in millimetres |
Uneven walls |
Gaps between wall and straight edge |
Use profile gauge to trace contours |
Total linear metres |
All measurements combined |
Add all measurements, divide by 1000 |
Standard Skirting Board Heights and Profile Selection
Standard skirting board height in the UK ranges from 100 millimetres to 230 millimetres. Most homes use 150 millimetres or 200 millimetres as a compromise between visual impact and practicality. Victorian and Edwardian properties often have taller skirting, 200 to 230 millimetres. Modern properties tend toward 100 to 150 millimetres for a cleaner look.
When measuring for skirting, measure at the height you've chosen. If you're replacing existing skirting, match the height unless you have a specific reason to change it.
Choosing the Right Profile for Your Space
Skirting profiles range from simple square-edged designs to ornate moulded profiles with multiple curves and details. Square-edged profiles are the most economical and work well in modern interiors. Moulded profiles have curved details that suit traditional and period properties better. Chamfered profiles have a bevelled edge that's a middle ground between square and moulded.
Your choice of profile doesn't affect measurement, but it does affect how visible measurement errors become. A simple square profile shows gaps and cutting errors clearly. A complex moulded profile can hide minor imperfections better.
Measuring for skirting boards correctly takes time, but it saves money and frustration later. A methodical approach to measurement, using the right tools, accounting for every corner and opening, and adding appropriate wastage allowance, ensures your material arrives exactly when you need it and in exactly the quantity required.
Frequently Asked Questions
How do you calculate the total linear metres needed when measuring for skirting boards?
Measure each wall in your room using a tape measure, recording lengths in metres. Add all wall lengths together, then subtract door opening widths. For example, if your room is 4m × 3m with one 0.8m door, calculate: (4 + 3 + 4 + 3) − 0.8 = 13.2 linear metres. Always add 10-15% wastage allowance for offcuts and cutting errors, bringing your total to approximately 14.9 linear metres. Using a skirting board calculator can automate this process and reduce errors.
How much wastage should I allow for skirting boards and offcuts?
Industry standard practice recommends allowing 10-15% extra material for wastage. This accounts for cutting errors, miter joint adjustments, and damaged sections during handling. For a 13.2 linear metre room, add 1.3-2 metres, totalling 14.5-15.2 linear metres to order. If your room has multiple internal and external corners requiring 45-degree miter cuts, increase wastage to 15% as corner cutting generates more offcuts. Premium moisture-resistant MDF skirting boards are durable, but accounting for wastage ensures you won't run short mid-installation.
Do you measure skirting boards with or without accounting for door frames?
Measure your room perimeter completely, then subtract the width of each door opening from your total. For example, if your room perimeter is 14 metres and you have two 0.8m doors, subtract 1.6m total, giving 12.4 linear metres. However, you may need additional skirting if architraves (decorative mouldings around the door frame) are present, as these affect how skirting boards meet the door frame. Always measure around architraves separately to ensure accurate coverage and professional finish.
What's the best technique for how to scribe skirting boards on uneven walls?
Scribing involves cutting the skirting board edge to match the contour of an uneven wall or plasterboard surface. Use a profile gauge or compass to trace the wall's irregularities onto the skirting board's back edge. Mark the cutting line clearly, then use a coping saw or jigsaw to cut along the marked profile. This technique is essential for achieving a professional finish when walls are not perfectly straight. For curved walls, gradual scribing in sections works better than attempting one continuous cut. Always test-fit before final installation.
This article was written using GrandRanker